Overview
The Certification Management Tool allows you to create and manage credit options, accredited providers, and certificates. All certificates created with the tool can be edited at any time, allowing administrators to instantly make changes.
The Certification Management Tool is really an entire suite of tools that are found on the Program(s) tab, under the Credit and Certificates link. The tools can be accessed with an individual activity selected from the Manage Your Program menu, or from the All Programs view.
The Certification Management Tool is an account-based permission, which can be added to individual administrative accounts by enabling the "Credit Configuration" account permission (more information on managing account permissions). Once the top-level Rievent Platform administrator in your organization has access to the tool, they can then enable and manage access to the tool for other administrative accounts.
Credit Options
Accredited Providers |
Certificates |
Credit Options
What is a Credit Option?
A credit option allows learners to claim credit for a specific credit type in an activity and consists of one certificate and one accredited provider. An accredited provider may have multiple credit options set up in Rievent.
For example, one accredited provider may have 5 different credit options:
- University Clinic - AMA PRA Category 1 Credit™ Physician
- University Clinic - AMA PRA Category 1 Credit™ Non-Physician
- University Clinic - ABIM Maintenance of Certification
- University Clinic - ANCC Nursing Credit
- University Clinic - ACPE Pharmacy Credit

To access all the complete list of credit options in your account, go to the Programs tab, click the Credit and Certificates link, then click the All Credit Options tab.
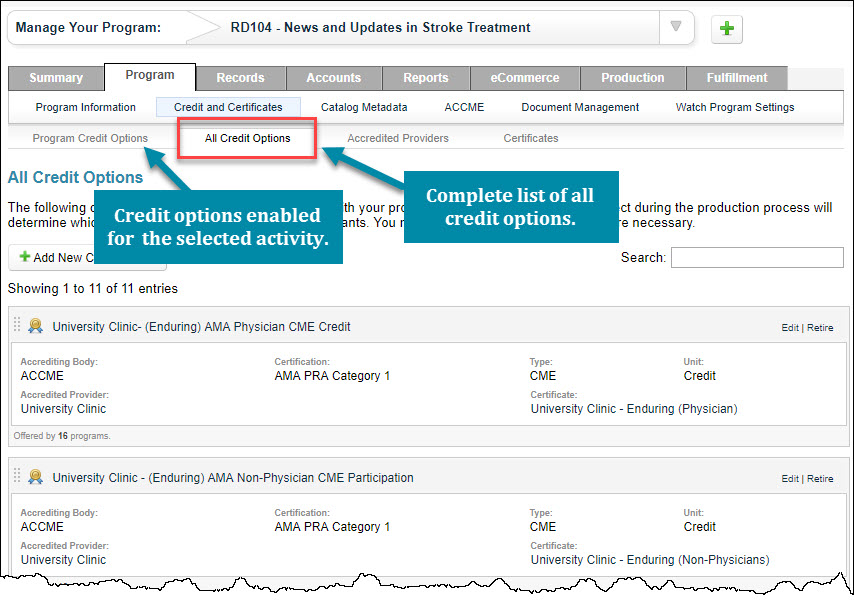
Creating a New Credit Option
From the Programs tab, click the Credit and Certificates link. Under the All Credit Options tab, click Add New Credit Option.

There are 3 steps to creating a new credit option:

Step 1: Add the Accredited Provider and Certificate
In the Provider and Certificate section, choose the accredited provider and select the certificate that will be awarded to learners if they select this credit option. If you have not already created the accredited provider or certificate, links are provided to do so.

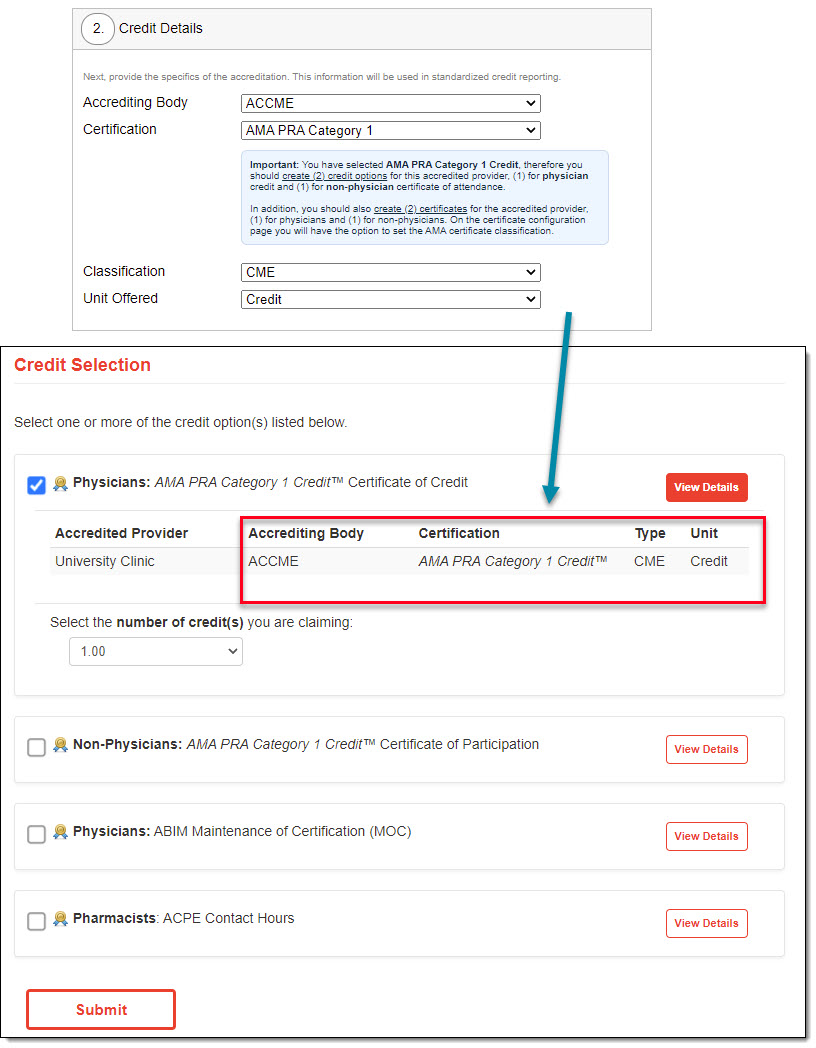
Step 2: Add the Credit Details
In the Credit Details section, provide the Accrediting Body, Certification, Classification, and the Unit Offered. Learners can see this information if they click the View Details button on the credit selection page. The information will also be used in credit reporting.
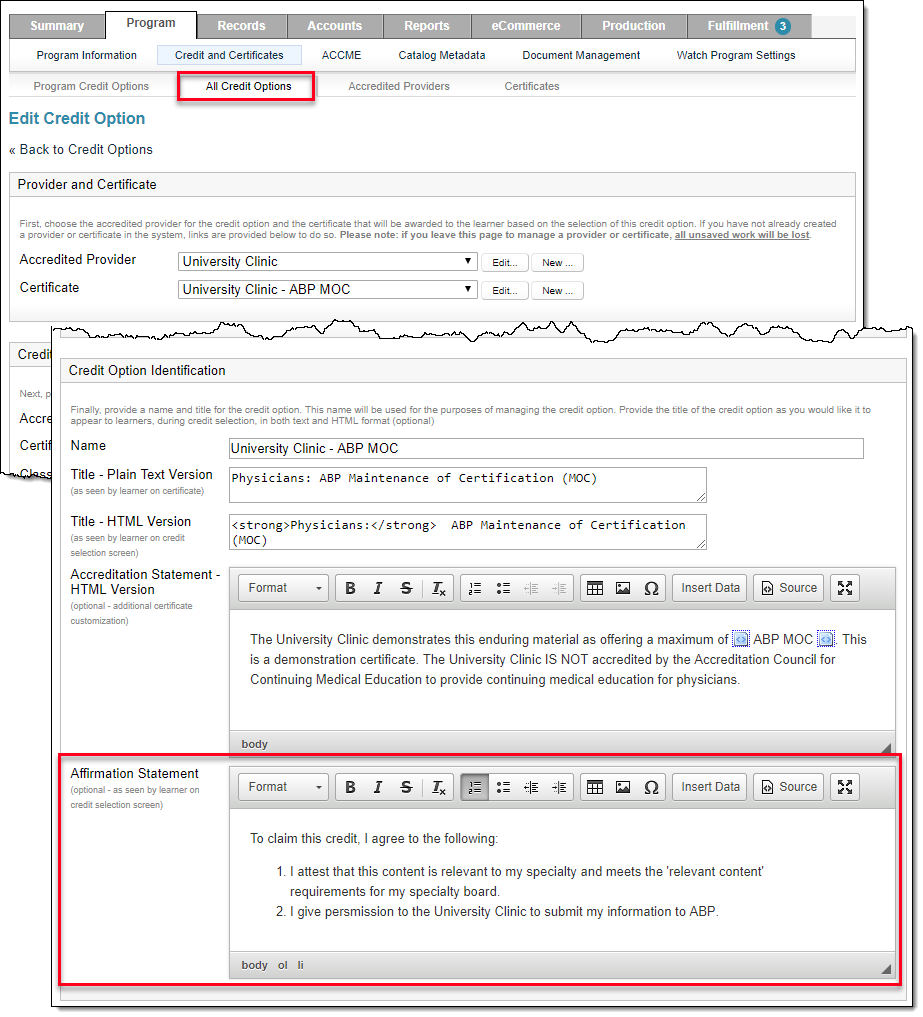
Step 3: Configure the Credit Option Identification
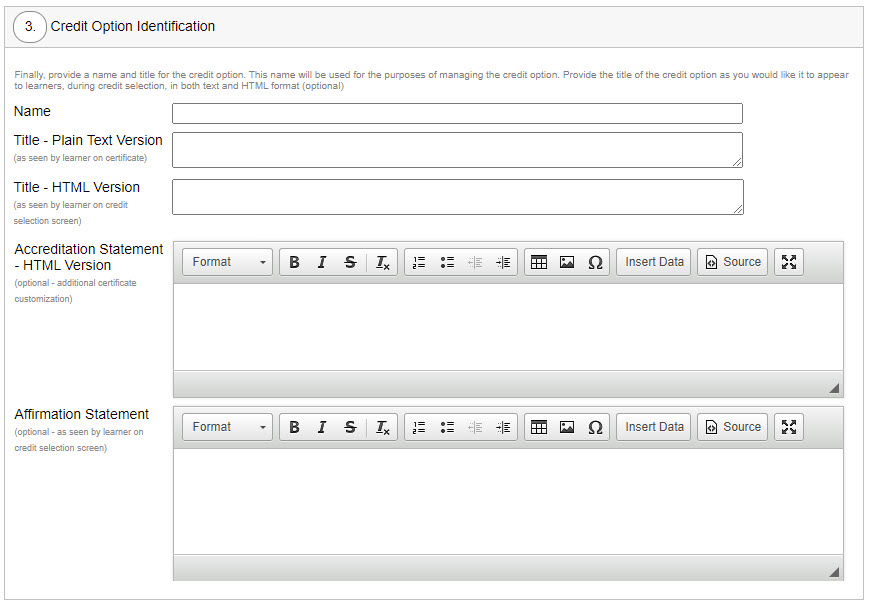
First, provide the Name of the credit option. The Name is how the credit option will be listed for administrators when creating a new activity and is also how the credit option will be listed in the Certification Management Tool. The credit option Name will never be displayed to learners.
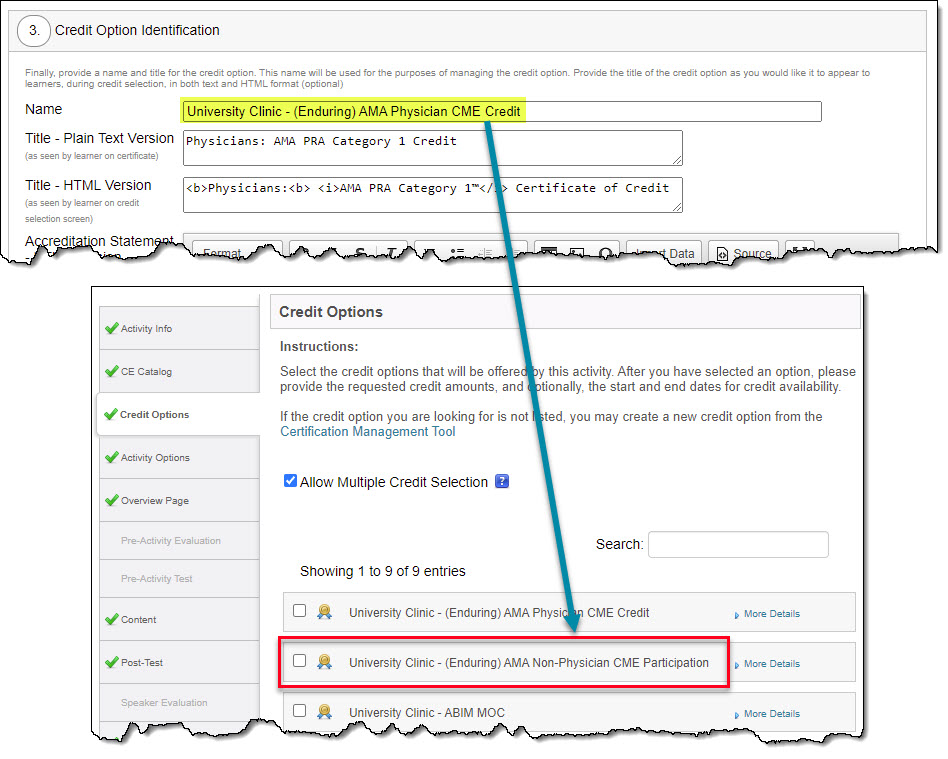
Next, provide the Title of the credit option as you would like it to appear to learners on the credit selection page and transcripts. The HTML Version field (optional) is available for adding text formatting (bold, italics, underline, etc).

Accreditation Statement
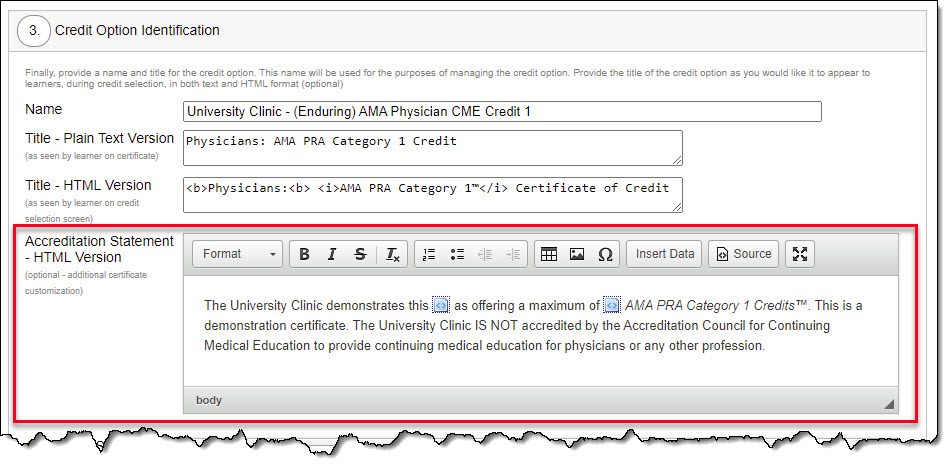
There are 2 ways to set up the accreditation statement on the certificate.
 Option 1: Add the accreditation statement to the "Accreditation Statement" field (as shown in the image above) and use the Accreditation Statement merge tag to display the text on the certificate.
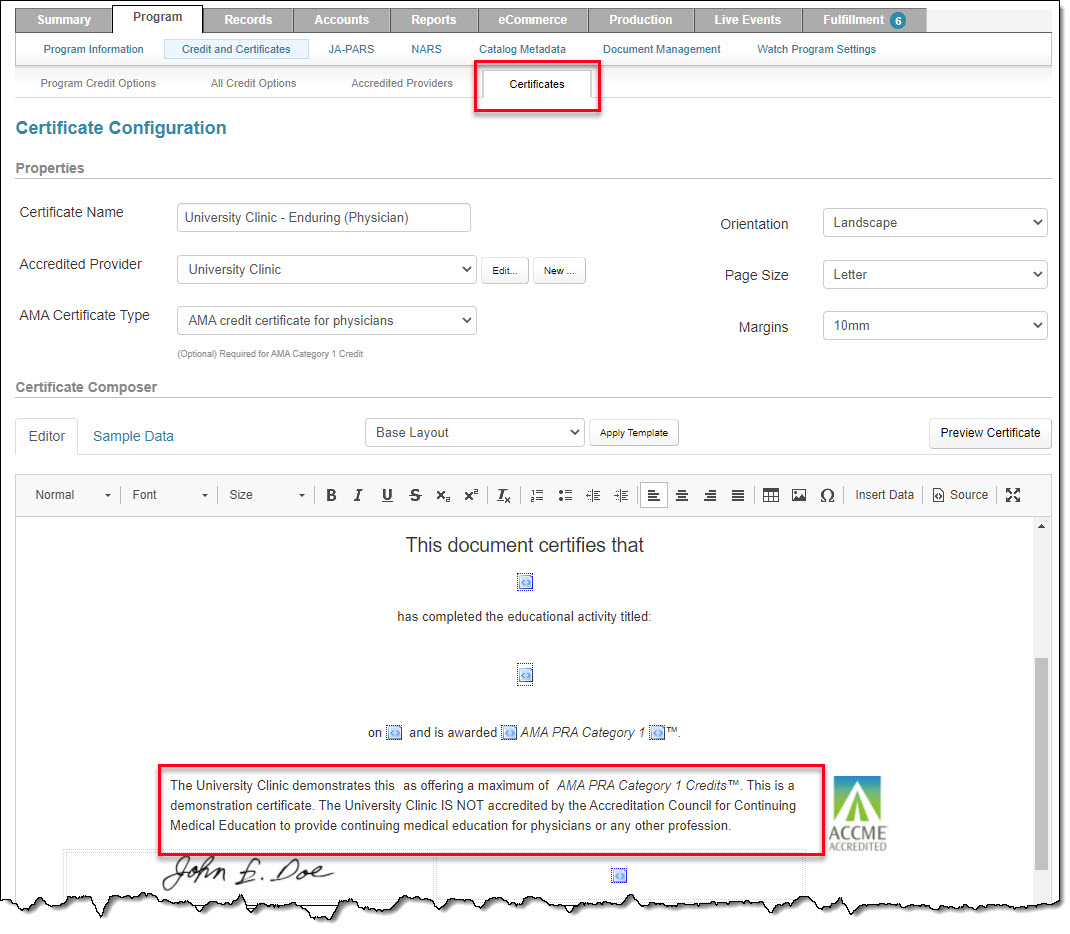
Option 2: Add the accreditation statement directly onto the certificate using the Certificate Composer.
*The benefit of Option 1 is that the merge tag allows for the default accreditation statement to be overwritten by a custom accreditation statement on a per-activity basis when needed.
OPTION 1
Add the accreditation statement to the "Accreditation Statement" field in the Credit Option Identification section (shown below) for the Credit Option associated with the certificate.
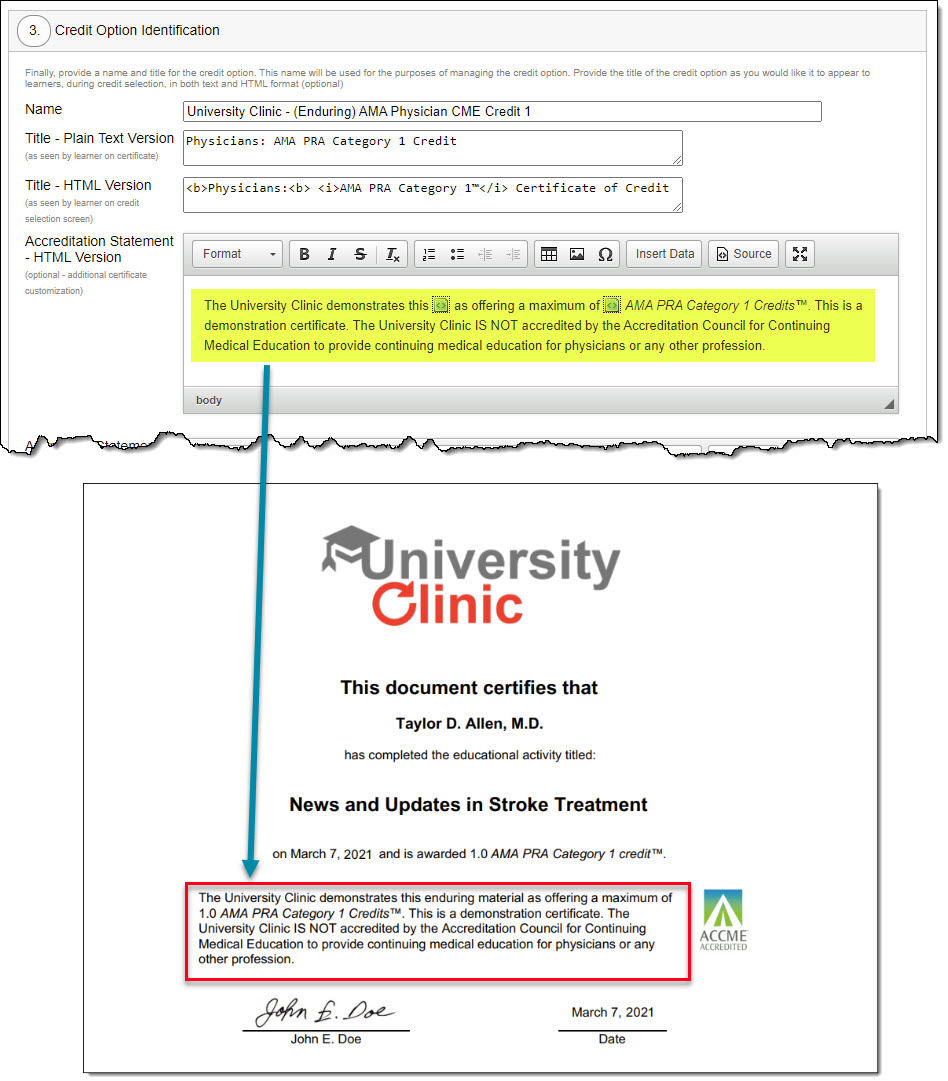 To use a custom accreditation statement instead of the default one, when setting up the activity, click the More Details link for the desired credit option, to display the Activity Accreditation Statement field. The provided information will overwrite the default accreditation statement and be merged onto the certificate. NOTE: This custom accreditation statement only applies to the selected activity.

OPTION 2
Add the accreditation statement to the certificate via the certificate composer.
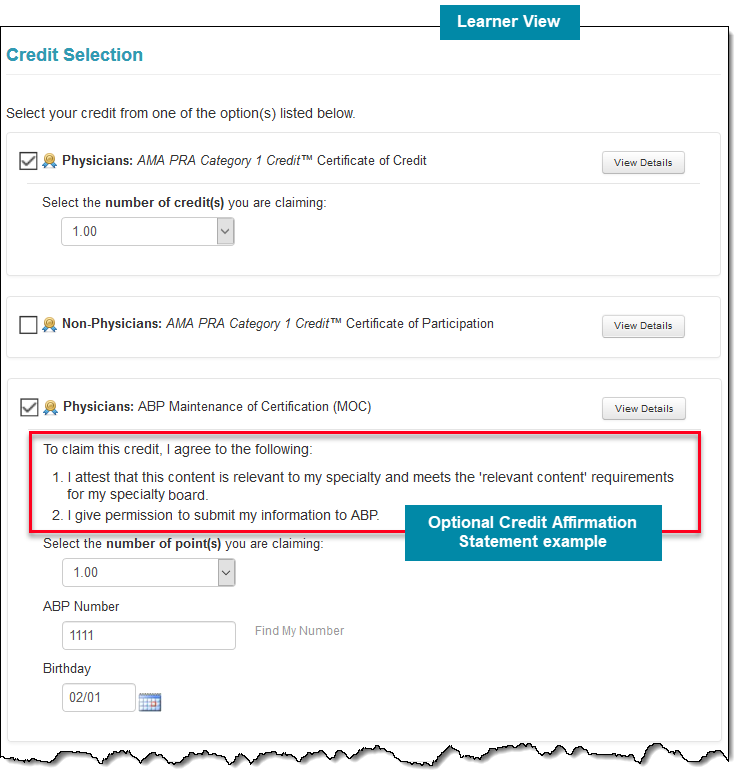
Credit Affirmation Statement (OPTIONAL)
The optional "Credit Affirmation Statement" can be added to any credit option. This statement will display to learners when they are selecting the credit type they would like to claim.
For example, if learners are required to agree to specific statements before requesting credit, these statements can be added using the "Credit Affirmation Statement" field when setting up the respective credit type.
| Learner View | Admin Configuration |
 Click Image to Enlarge Click Image to Enlarge |
 Click Image to Enlarge Click Image to Enlarge |
After completing all 3 sections, click the Save button. The new credit option will be immediately available to select from within the template. Existing activities can also be edited to include the new credit option.
Editing a Credit Option
1. From the All Credit Options tab (found under the Programs tab > Credit and Certificates link), locate the credit option that needs to be changed, then click the Edit link.
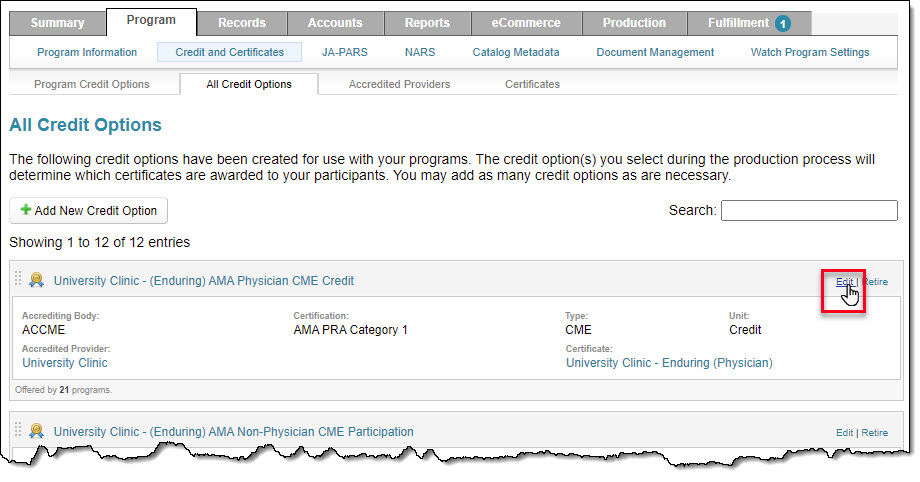
 2. Make the desired changes, then click the Save button.
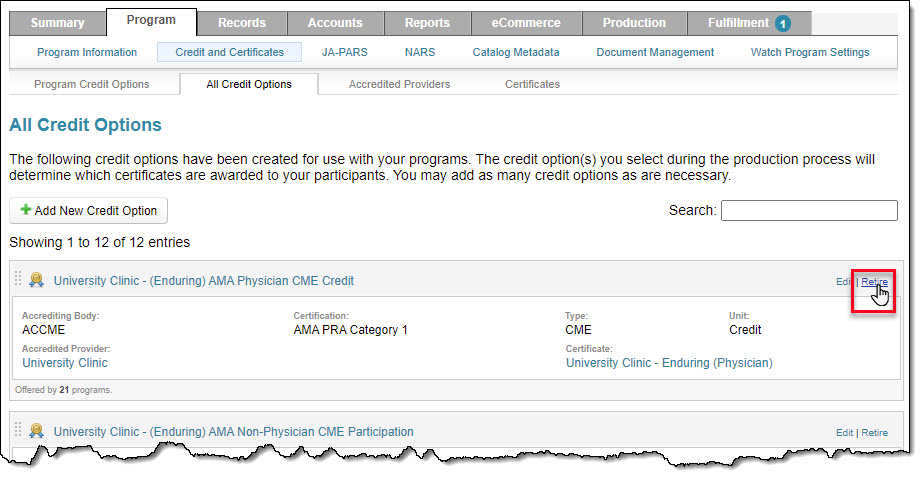
Retiring a Credit Option
Once a credit option is expired, it will immediately become unavailable to learners. This includes any existing activities that were using the credit type. Retired credit options will not display in the Production Wizard.
From the All Credit Options tab, locate the credit option, then click the Retire link.
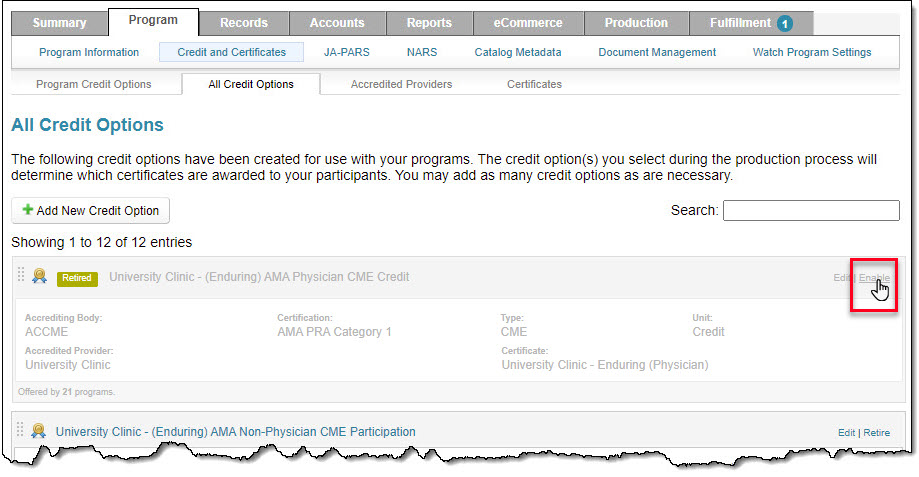
 Retired credit options can always be reactivated by clicking the Enable link.

Accredited Providers
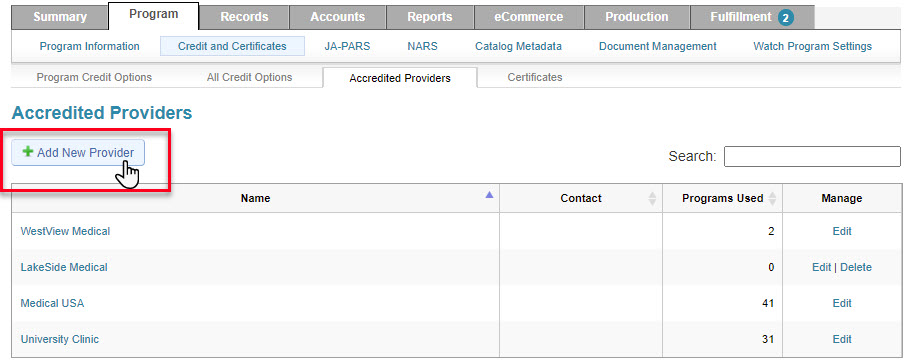
Create, manage, and view all your Accredited Providers from the Accredited Providers tab, located under Credit and Certificates on the Program tab.
From the Accredited Providers tab, a table shows all the accredited providers that have been set up in the Rievent Platform. The table also includes contact details, the number of activities configured with a credit type from the accredited provider, and options to edit and/or delete an accredited provider. Sort the table by clicking the column headers.


Creating a New Accredited Provider
1. First, navigate to the Programs tab, then click the Credit and Certificates link. From the Accredited Providers tab, click the Add New Provider button.
2. In the Organization/Institution section, enter the Name and HTML Label. You can also add an accredited provider's contact information. (OPTIONAL and for internal reference only, learners will not see this information.)
The Name field is shown to learners under the "View Details" button on the credit selection page of an activity, and is also displayed on certificates and transcripts. The HTML Label field allows you to add HTML formatting to the accredited provider's name. If there is no additional formatting needed, simply enter the plain text version of the accredited provider's name.
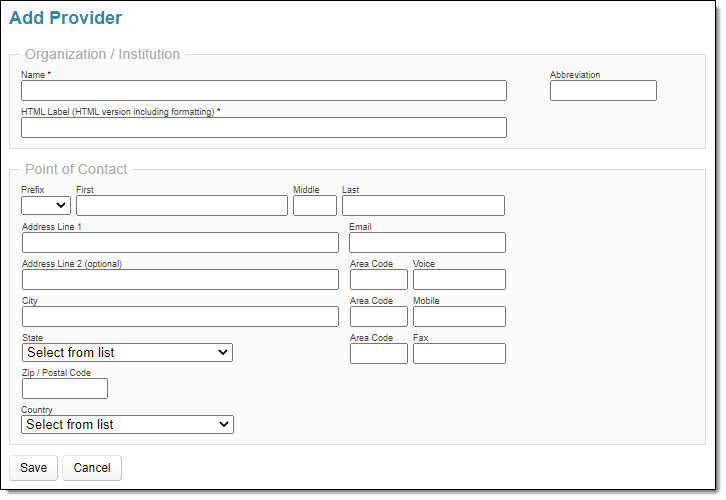
3. After completing all required fields, click the Save button.
Editing an Accredited Provider
1. On the Accredited Providers tab, identify the Accredited Provider in that needs to be changed, then click Edit.
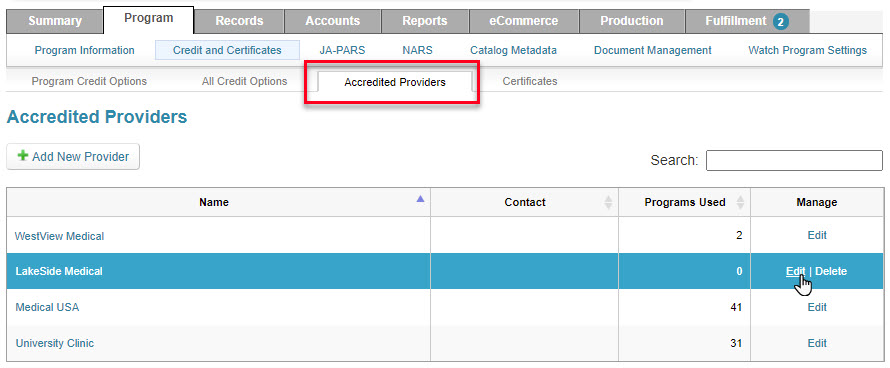
2. Make the desired changes. When finished, be sure to click the Save button.
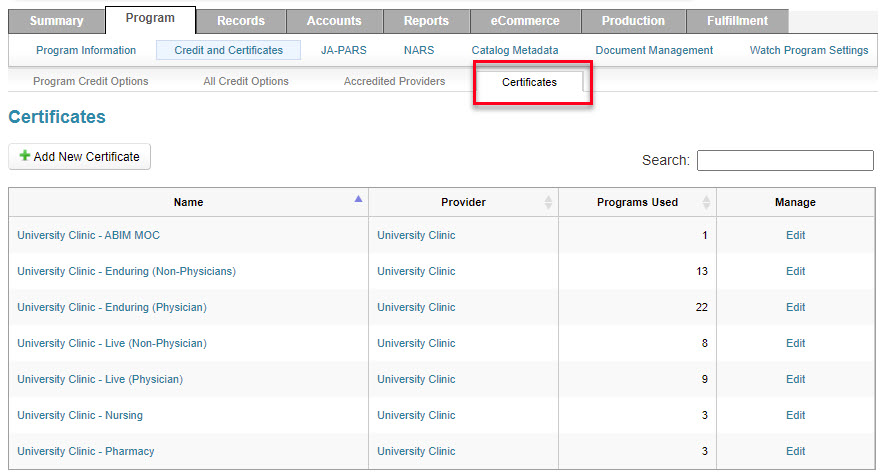
Certificates
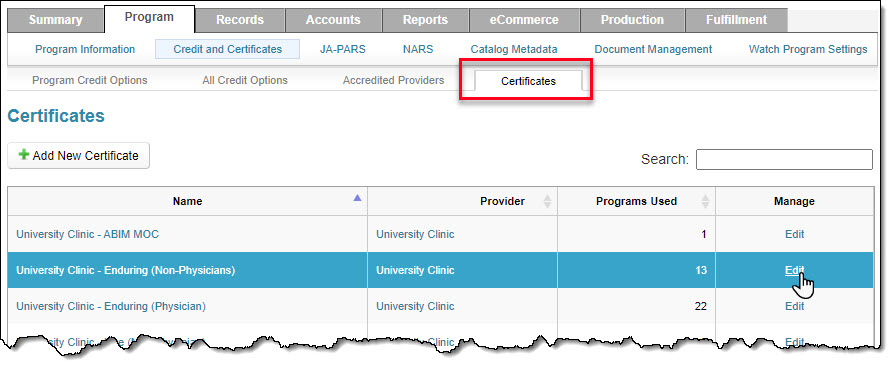
From the Certificates tab, a table shows all certificates that have been set up in the Rievent Platform. The table includes each certificate's name, accredited provider, the number of activities using each certificate, as well as an option to edit each certificate. Sort the table by clicking the column headers.
Creating a New Certificate
1. First, navigate to the Programs tab, then click the Credit and Certificates link. From the Certificates tab, click the Add New Certificate button.
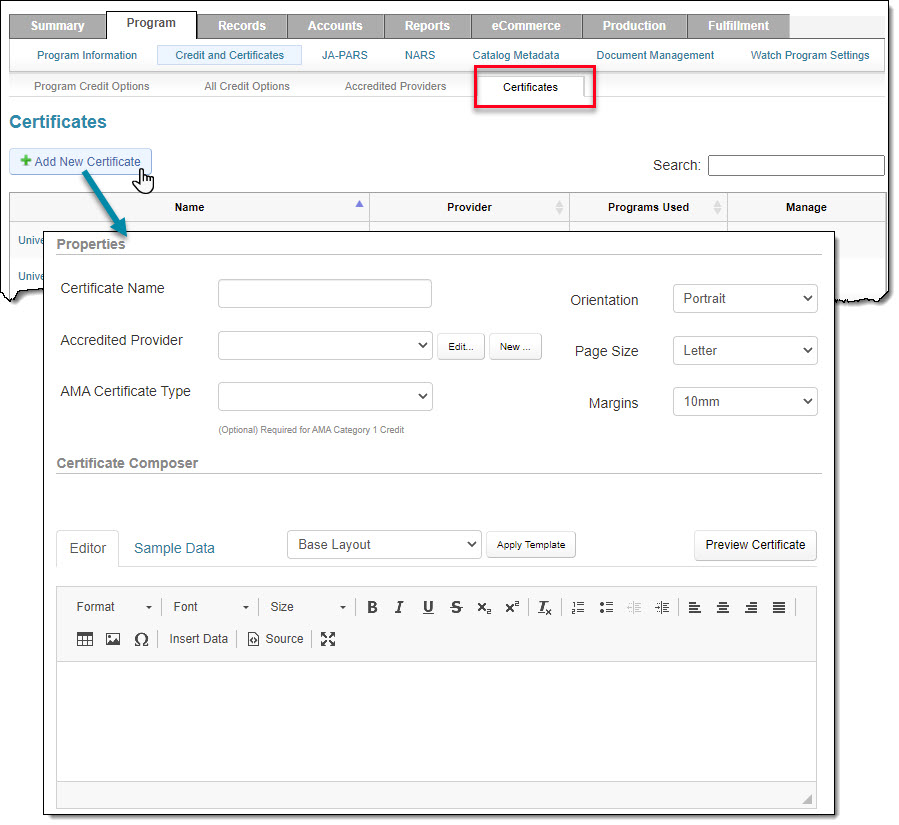
2. First, enter the Certificate Name. This name is shown to administrators when configuring a credit option and is NOT displayed to learners.
3. Next, select the Accredited Provider. If the accredited provider has not already been created, click New... to create one.
 4. If the certificate is for AMA Category 1 credit, select the correct AMA Certification Type. If the certificate is NOT for AMA Category 1 credit, then leave it blank.
5. Next, use Certificate Composer to build a new certificate.
A variety of certificate templates are available to serve as a starting point, or you may create the certificate from scratch. To apply a template, select it from the list, then click Apply Template.
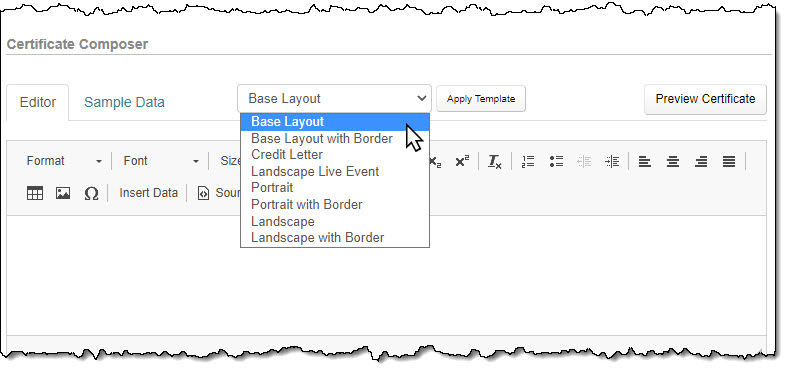
Certificate Templates:
|
Base Layout
Blank layout with no text and no border |
Base Layout with Border
Border with no text |
Credit Letter
Letterhead style layout with, placeholder images for a logo and signature. |
Landscape Live Event |


 Includes optional placeholder images for a logo and signature.
 Includes optional placeholder images for a logo and signature.
 Includes optional placeholder images for a logo and signature.
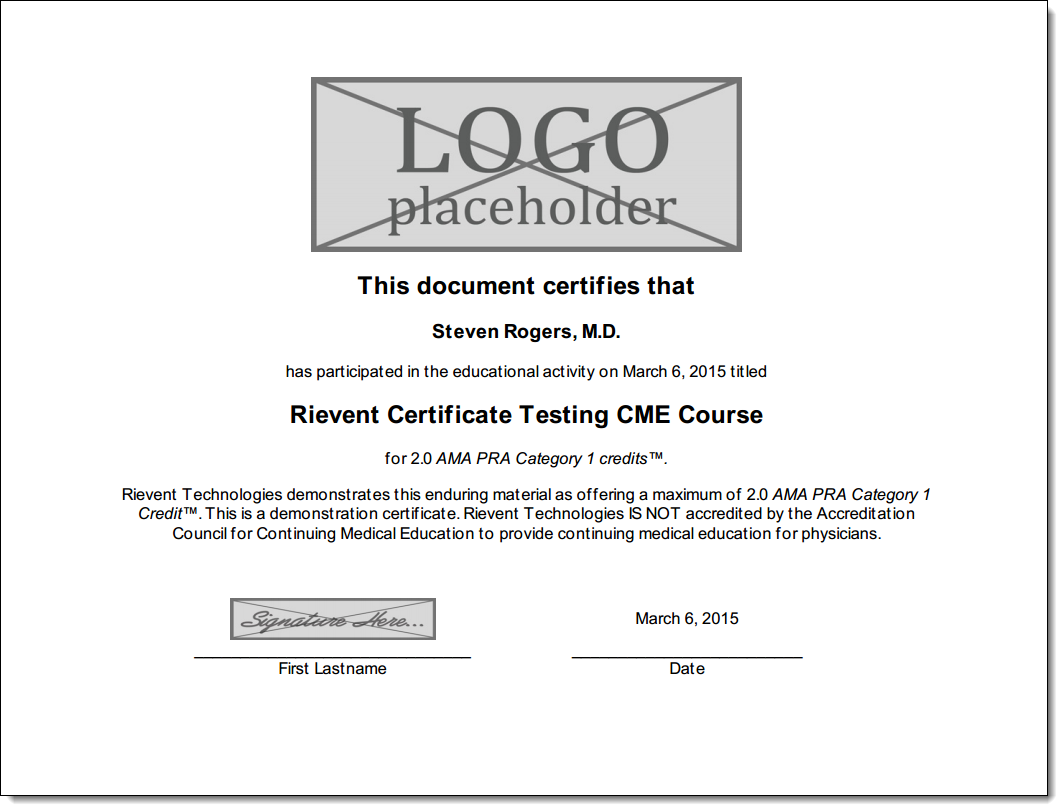

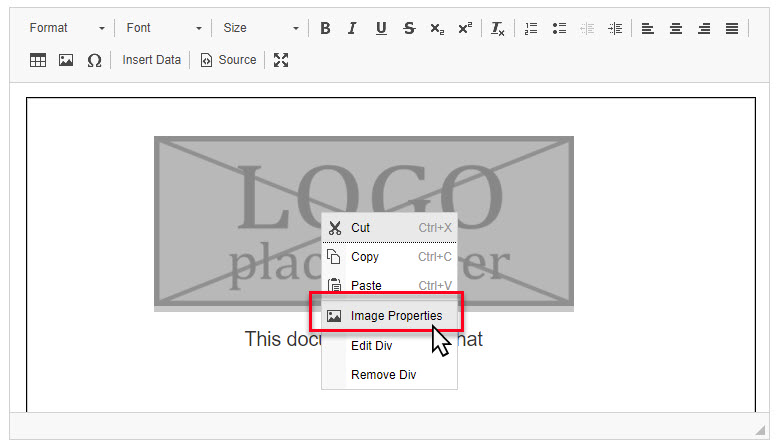
Replacing an Image on a Certificate
To replace the logo or signature image in a template, double click the image and replace the placeholder image URL with the URL for your image. You can also right click, then select Image Properties to update the image.


Merge Tags
When building certificates, using Merge Tags allows for various types of data to be pulled into the certificate. For example, a merge tag can be used to automatically display data like the activity type, max credit amount, learner name, degree, etc.
Merge tags are indicated by the ![]()
![]() icon. Hover the cursor over the
icon. Hover the cursor over the![]() icon to identify the merge tag.
icon to identify the merge tag.
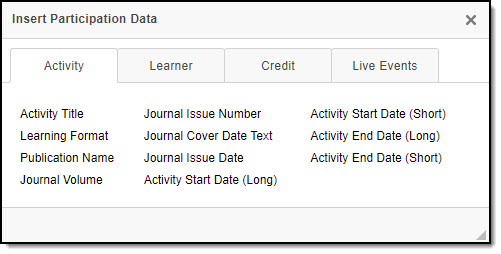
Click Insert Data to access the merge tag selection menu. Merge tags specific to Live Events are also available.

|
Activity Data Merge Tags
Learner Data Merge Tags
|
Credit Data Merge Tags
Live Event Data Merge Tags
|
Custom Merge Tags:
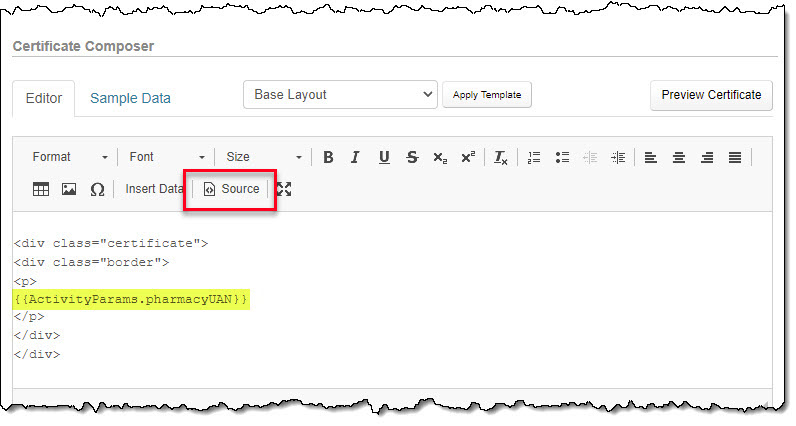
Merge tags can be created for any field in the production wizard. Many of the most common merge tags are already available from the "Insert Data" menu on the Certificate Editor, however, if your template includes special fields for values like Pharmacy UAN or Activity ID#, you can create custom merge tags to pull the information entered in those template fields and display it on the certificate.
Open the certificate to access the Source view, then use the format below to enter the custom merge tag. Simply substitute the red text in the example with the name of the template field. Be sure there are no spaces in merge tag.
{{ActivityParams.field name goes here}}
For example, if the custom field in the template was labeled "Pharmacy UAN," you would enter:
{{ActivityParams.pharmacyUAN}}
For Activity ID, you would enter:
{{ActivityParams.programid}}
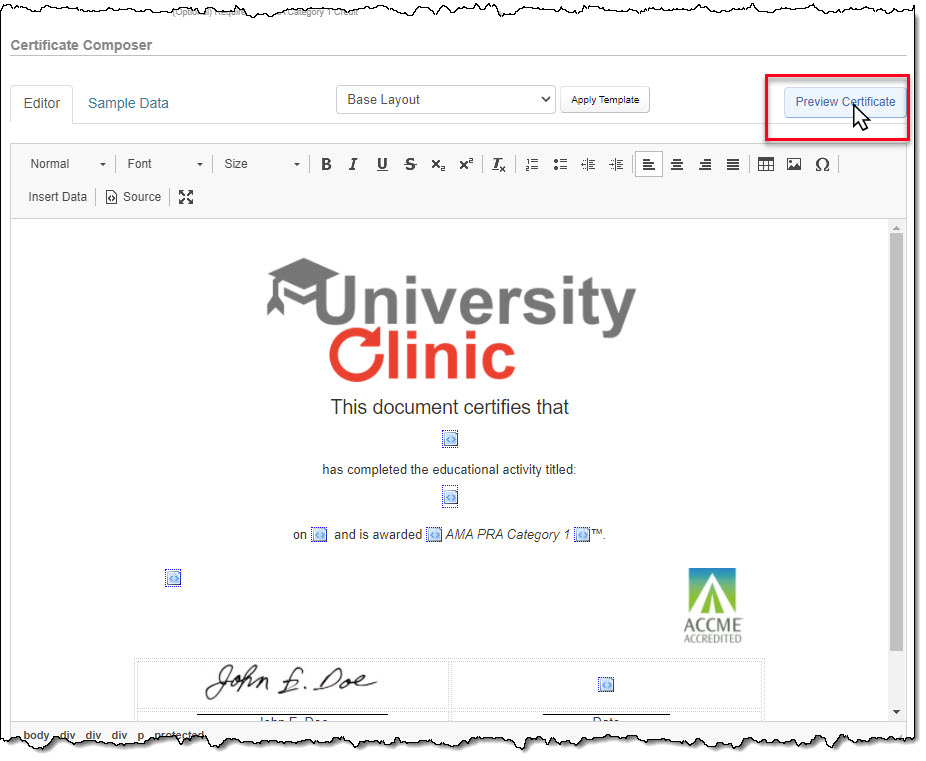
Previewing the Certificate with Sample Data
To preview the certificate as a learner would see it, click the Preview button.

When using merge tags, the Sample Data tab allows you to customize the sample data that is merged onto the certificate when generating the preview.

Editing a Certificate
When editing a certificate, once the changes are saved, they will be immediately reflected on all issued and future certificates.
There are two types of certificates in the Rievent Platform:
- Standard Certificates: Certificates created using the Certification Management Tools (CMT).
- Full-Service Certificates: Certificates manually created by Rievent, before the Certification Management Tool was available. Full-service certificates cannot be edited by an admin. If changes are needed, you can either (1) contact Rievent for assistance, or (2) replace the full-service certificate with a new standard certificate. Re-creating the certificate with the Certificate Composer will allow you to manage any future changes needed to the certificate.
To edit a standard certificate:
1. First, navigate to the Programs tab, then click the Credit and Certificates link.
From the Certificates tab, scroll through the list or use the search box to locate the certificate that needs to be changed. Once located, click the Edit link.

2. Make the desired changes.
3. When finished, be sure to click the Save button.
Replacing a Full-Service Certificate

If you would like to replace your existing full-service certificate with a new standard certificate:
1. First, navigate to the Programs tab, then click the Credit and Certificates link. From the Certificates tab, scroll through the list or use the search box to locate the full-service certificate that needs to be re-created. Once located, click the Edit link.
2. To remove the existing certificate and compose a new one, check the certificate authoring box.
Checking the box for enabling the certificate authoring tool will not overwrite the existing certificate. Only after clicking the save button will the new certificate overwrite the legacy full service one.
3. Use the Certificate Composer to re-create the certificate. More information on building certificates.
 4. When finished, be sure to click the Save button.
Credit Options
Accredited Providers |
Certificates |